Set Up Your Shop Floor for Barcode Scanning

A step-by-step guide to physically setting up your shop floor for barcode scanning — from choosing hardware and mounting displays to posting labels and training your team.

Physical Setup Walkthrough

Getting Standard Time® installed is only half the job. This guide covers everything you need to do on the floor itself — station layout, hardware placement, label posting, and go-live preparation — so your team can start scanning from day one.

Shop floor worker scanning a work order barcode label while tablets mounted nearby display job status in Standard Time

Step 1 — Plan Your Scan Stations

Walk your floor and identify every location where employees start or stop work. Each of these is a candidate scan station. Common placements include:

  • The entrance to a production cell or assembly area
  • Next to a machine or workstation an employee operates alone
  • At a shared staging or kitting area
  • Near a receiving or shipping dock for material scans

Aim for a station within arm's reach of where work actually begins — not across the room. The closer the scanner is to the work, the more likely employees are to use it.

Step 2 — Choose Your Hardware

Standard Time® works with any scanner that emulates a USB or Bluetooth keyboard — which covers the vast majority of consumer and industrial scanners. You don't need anything proprietary.

For most shop floors, a practical low-cost setup is:

  • USB corded scanner — plug it into a wall-mounted tablet or PC. Reliable, no battery concerns, under $50.
  • Bluetooth scanner + Android or Windows tablet — fully wireless. The scanner pairs like a keyboard. Tablet can be wall-mounted or handheld.
  • Handheld mobile device — employees carry a phone or tablet and scan wherever they work.
Pro Tip: A mid-range Android tablet and a Bluetooth barcode scanner can cost less than $200 combined — a fraction of the cost of a dedicated PC workstation, with equal scanning capability.

Step 3 — Mount Tablets and Displays at Workstations

Tablets and monitors serve two roles on the shop floor: they host the scanning interface and they display real-time job status for employees and supervisors. Mount them where they are visible without requiring employees to walk away from their work area.

  • Use inexpensive wall-mount or pole-mount brackets for tablets
  • Position screens at eye level to reduce fatigue during long shifts
  • For shared cells with multiple employees, a larger monitor visible from several workstations is more practical than individual tablets
  • Protect tablets from dust, oil, and vibration with industrial cases if your environment warrants it

Standard Time® runs in any modern browser, so any device that can display a webpage can serve as a scanning terminal.

Step 4 — Print and Post Barcode Labels

Labels are the physical link between the floor and the software. Each employee, work order, and task needs a printed barcode. Print labels using the free IDAutomationHC39M Code 39 font in Word or Excel, or use Standard Time®'s built-in label printing.

Where to post labels:

  • Employee labels — on a badge, a lanyard card, or a fixed label at the employee's primary station
  • Work order labels — on the traveler or router that moves with the job, or on the bin / pallet holding the parts
  • Task labels — at the specific machine or bench where that operation is performed
  • STOP labels — one at every scan station so employees can always end a timer quickly
  • Command labels — COMPLETED, SCRAP, MATERIAL, or any other scan actions your workflow uses
Pro Tip: Laminate high-traffic labels like STOP, employee IDs, and frequently-run work orders. A laminated label in a dirty shop environment lasts months instead of days.

Step 5 — Configure Barcode Rules in Standard Time®

Before your team scans live jobs, set up your barcode rules in Standard Time® to match your scan sequences. Rules define what happens when each barcode is scanned — which timer starts, which task is assigned, and what data is captured.

Common rule patterns to configure:

  • Employee scan → work order scan → start timer on that employee and job
  • Work order scan → task scan → start timer for the task
  • STOP scan → end the active timer for that employee
  • Material scan → log a material consumption entry

See the Basic Setup & FAQ for a full software walkthrough, and the Barcode Q & A for answers to common rule configuration questions.

Step 6 — Train Your Employees

Barcode scanning should be intuitive enough to learn in under five minutes. Keep training focused and practical:

  • Show each employee their personal barcode label and where to find it
  • Walk through one complete scan sequence: clock in, start a job, stop the timer
  • Point out where the STOP label is at every station
  • Explain what to do if a scan doesn't register (rescan, check label alignment)
  • Let employees do a practice scan before going live

Avoid lengthy classroom sessions. The best training is a 5-minute walkthrough at the actual station with a real scanner in hand.

Step 7 — Go Live and Monitor Your First Day

On launch day, have a supervisor or administrator monitor the Time Logs view in Standard Time® in real time. Watch for:

  • Missing entries — an employee may have forgotten to scan in, or a label may need to be reprinted
  • Duplicate timers — two open entries for the same employee indicate a missed STOP scan
  • Unexpected project or task assignments — a mismatch between the label text and the project name in Standard Time®

Most issues surface and are corrected within the first two hours of the first day. After that, scanning typically runs without intervention.

Use the Time Log Calendar to review the full day's scan history at a glance, and the production schedule to compare actuals against planned job times.

Videos

Setting up shop floor barcode scanning in Standard Time®

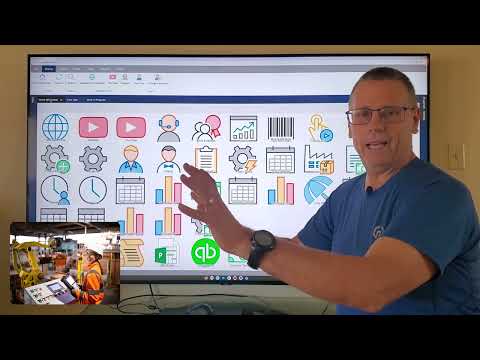
Setting Up Shop Floor Barcode Scanning

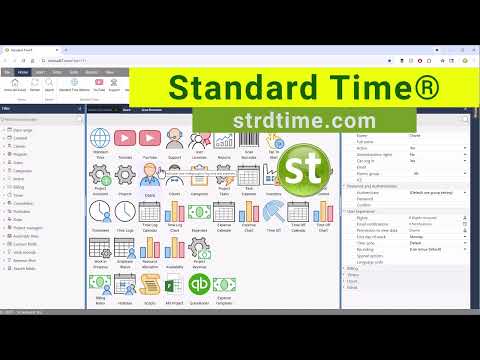
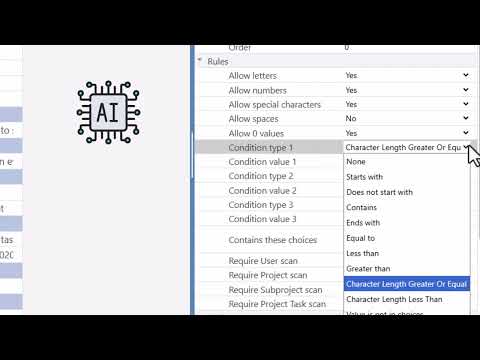
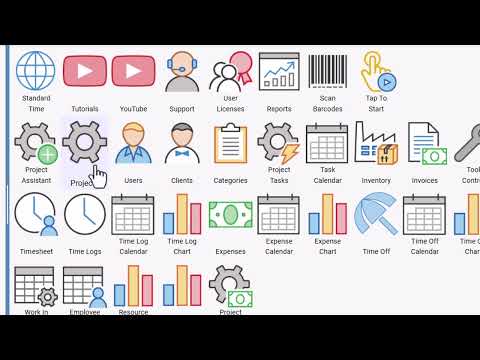
A walkthrough of the shop floor barcode scanning setup process in Standard Time® — from hardware connection and label creation to configuring scan rules and confirming your first time log entry.

Watch: Shop Floor Setup
Printing barcodes in Microsoft Word for shop floor scanning in Standard Time®

Printing Barcodes in MS Word

How to print barcode labels using Microsoft Word and the free IDAutomation Code 39 font — the fastest way to get employee, work order, and task labels ready for the shop floor.

Watch: Printing Barcodes
Creating users and barcodes for scanning in Standard Time®

Creating Users and Barcodes for Scanning

Step-by-step walkthrough of creating employee user accounts and generating their barcode labels in Standard Time® — the foundation of any shop floor scanning setup.

Watch: Creating Users & Barcodes
Creating work orders and barcodes for scanning in Standard Time®

Creating Work Orders and Barcodes for Scanning

How to create work orders in Standard Time® and generate the barcode labels employees scan on the shop floor to start tracking time against a job.

Watch: Creating Work Orders
Time logs and where to find barcode scans in Standard Time®

Time Logs and Where to Find Barcode Scans

How to navigate the Time Logs view in Standard Time® to find and verify barcode scan records — confirming that every scan landed correctly after your shop floor goes live.

Watch: Time Logs & Barcode Scans
Standard Time® Features Walkthrough

Standard Time® Features Walkthrough

An in-depth walkthrough of Standard Time® features — including AI scheduling, resource allocation, customer invoicing, QuickBooks® integration, and time tracking tools for manufacturing teams.

Watch: Features Walkthrough

Ready to Get Your Shop Floor Scanning?

Download the free trial and go from setup to your first scan in a single day. Our support team is available to help every step of the way.

View Pricing Talk to Support